
web application generator makes easy development of line-of-business applications.
Now you can build line-of-business web modules that are instantly ready for deployment
to your DotNetNuke web portal.
If you have experience with creating database web applications, then you’ve probably
considered using a dynamic portal to increase the flexibility of your web application.
One can easily picture a whole world built around a few business data enabled pages.
Users register using a portal, with the latest release notes and instructions posted
for their convenience. Add a quick online survey and a few blog posts to your web
application, without a fuss.
If you try building such a portal on your own, you will soon find that the task
is not that simple. While you may be the leading expert in web application design
with a database to prove it, web content delivery is another topic altogether. Content
management systems such as
DotNetNuke and
Microsoft SharePoint are
widely adopted by organizations and businesses of all sizes as repositories of knowledge
and web assets.
DotNetNuke is a proven portal software built with ASP.NET, boasting countless
installations and a large dedicated user base. The easily available
Community Edition
of this product makes it especially attractive for developers who need portal-style
functionality in their application at a low cost.
DotNetNuke is exceptionally easy to install and maintain – done entirely
in a web browser.
DotNetNuke also has impressive extensibility. One popular
method of extending
DotNetNuke is module development. A “module” represents
an area on a portal page that is rendered by a custom application. For example,
a calendar of events or a survey can be implemented as a module and placed on any
portal page.
You can also create a database application with complex data management features
and have it incorporated in a
DotNetNuke module. The development process
is somewhat complicated. Here is where Code On Time’s
DotNetNuke Factory
comes to the rescue.
DotNetNuke Factory will aid you in building a dedicated
application packaged as a
DotNetNuke module. This module can be deployed
to the portal in seconds.
Many popular software titles, including
DotNetNuke, were developed for Microsoft
ASP.NET Web Platform. Microsoft has created
WebMatrix, a vehicle to
allow simple download and installation of many popular open source web applications.
WebMatrix includes a lightweight version of Microsoft Internet Information
Services called
IIS Express. This web server makes it possible to run web
applications on virtually any type of operating system from Microsoft. You will
have to download
WebMatrix at
http://webmatrix.com
to proceed with this tutorial.
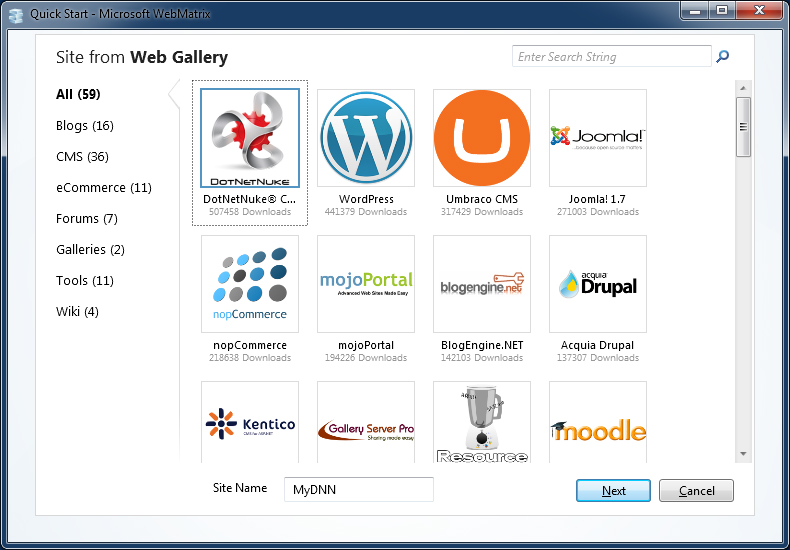
Run
WebMatrix and create a new web site from the
Web Gallery. Select
DotNetNuke and enter "MyDnn" in the
Site Name box at the bottom of
the screen. Click the
Next button.
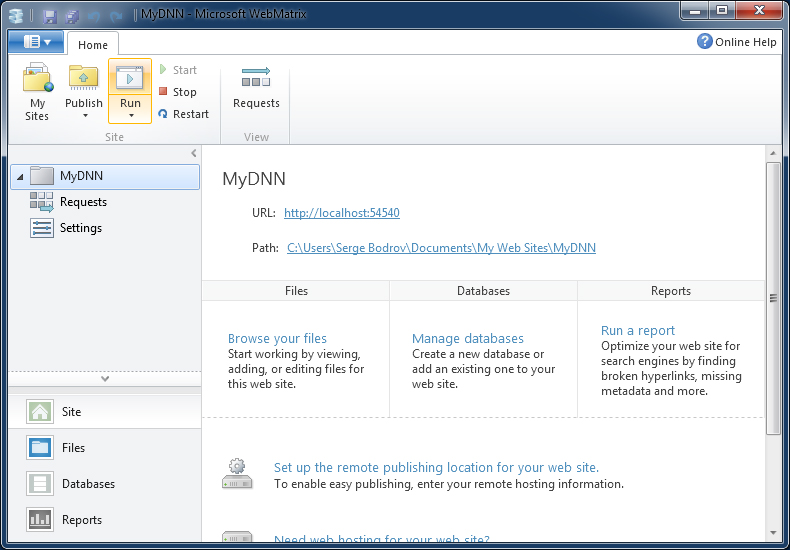
Accept the
EULA and wait for
DotNetNuke to download and install. The
new site will be opened in
WebMatrix when the download process has been completed
and the web site is ready for use. Click
Run button on the tool bar to start
the portal web site.
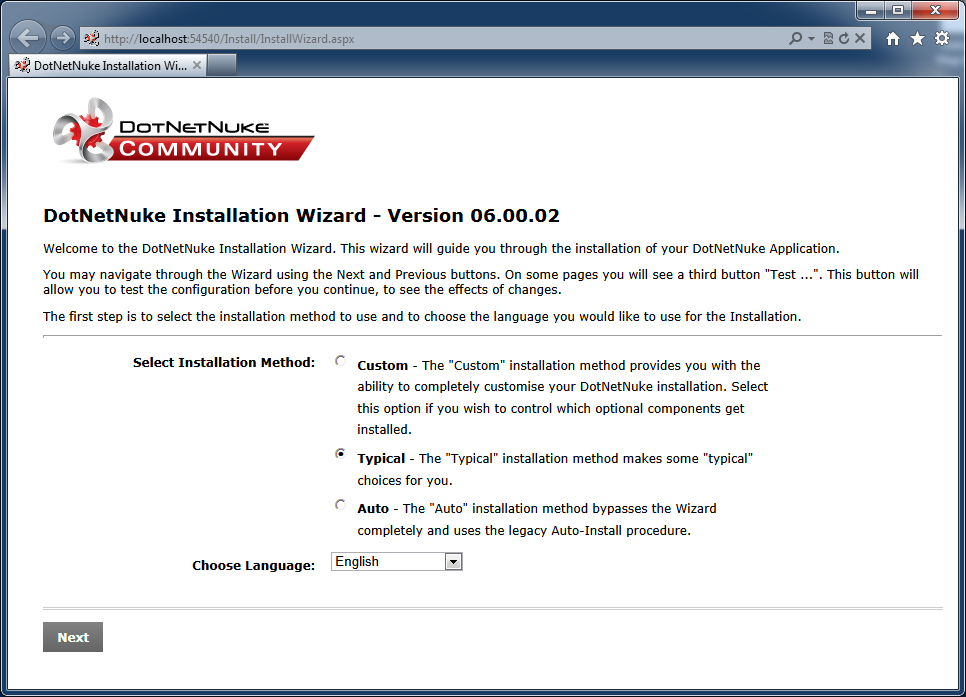
Your default web browser will display the
DotNetNuke Installation Wizard.
Choose
Typical installation method and click
Next.
Make sure that your site passes the file permissions check and press
Next.
On the
Configure Database Connection page, select your database server type
and enter the database name. Enter "DNN" in the
Object Qualifier input box.
DotNetNuke will add this prefix to the names of all database objects that
it needs to create, which will allow you to distinguish your own database tables
from those that belong to the portal.
Click
Next and wait for the installation of the system scripts to finish.
If an error is displayed or “undefined…success” is looping, you have probably entered
incorrect connection settings. Click
Next when installation of database is
complete.
You will be prompted to enter the identities of two users –
host and
admin.
The first user “owns” the entire portal and can install any content including new
modules. The second user is allowed to perform various administrative functions.
We suggest that you enter passwords
host123% and
admin123% for the
corresponding user identities for this tutorial. Leave the other settings as default.
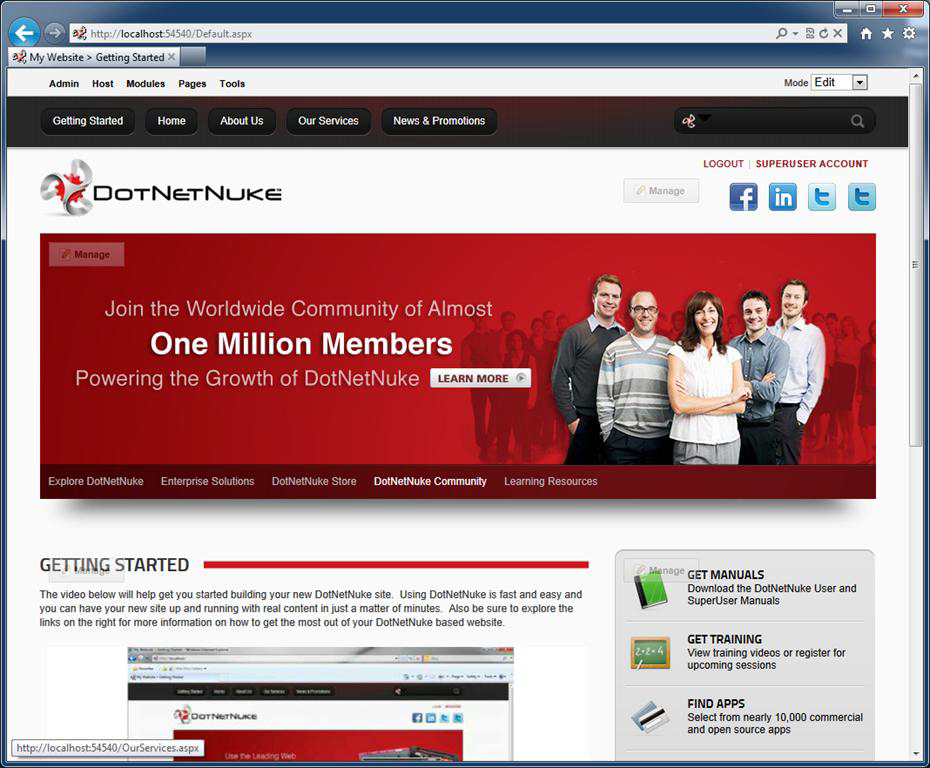
Once complete, the portal home page will open and you will be automatically logged
in as
host/host123%.
We are now ready to create our first line-of-business application integrated with
DotNetNuke portal. Start
Code On Time generator and select
DotNetNuke
Factory project.

Enter MyFirstDnnApp in the project name and choose the implementation language for
your application (the project must have a different name from your DNN website).
The project wizard will show up.
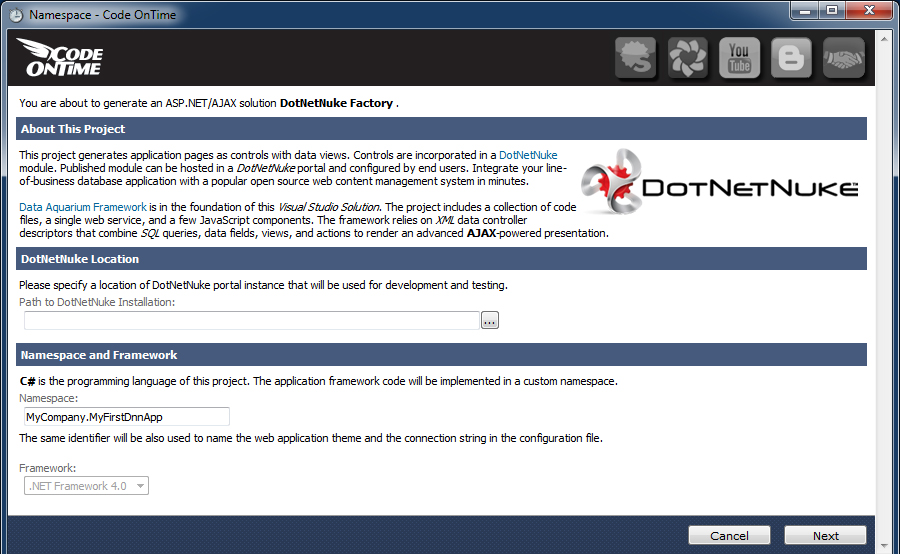
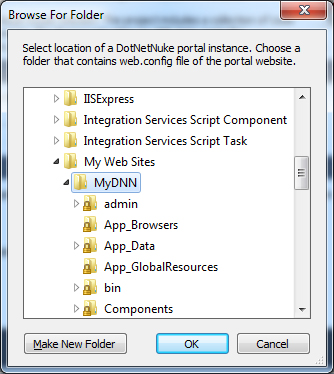
Under
DotNetNuke Location, click on the “…” button on the right-hand side
of the
Path to DotNetNuke Installation field. Browse to "[My Documents]\My
Web Sites\MyDnn" and press
OK.
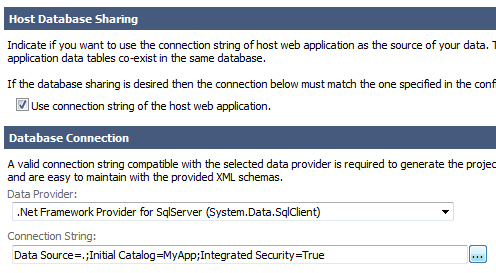
Click
Next and you will arrive to the
Database Connection page. Typically,
your application will share the database with
DotNetNuke, particularly if
you plan to sell or distribute your module to other owners of
DotNetNuke
portals. If this is your situation, leave “Use connection string of the host application”
box checked.
You can also use
DotNetNuke as a powerful front end for the Internet facing
portion of your web site and build an application with other types of backend database
servers such
Oracle and
MySQL. If this is the case then make sure
to uncheck “Use connection string of the host application” box and configure your
database connection.
If you are creating your first app in a blank
SQL Server database then we
suggest populating this database with content. Click the “…” button next to
Connection
String field.
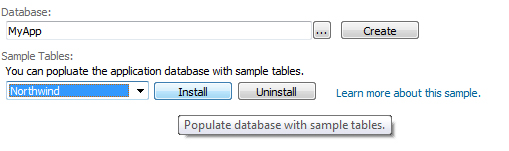
Select "Northwind" under
Sample Tables and click
Install. Your database
will be populated with the contents of the sample
Northwind database. This
content now co-exists with
DotNetNuke database objects. Click
OK to
confirm successful installation and click
OK one more time to finish connection
string configuration.
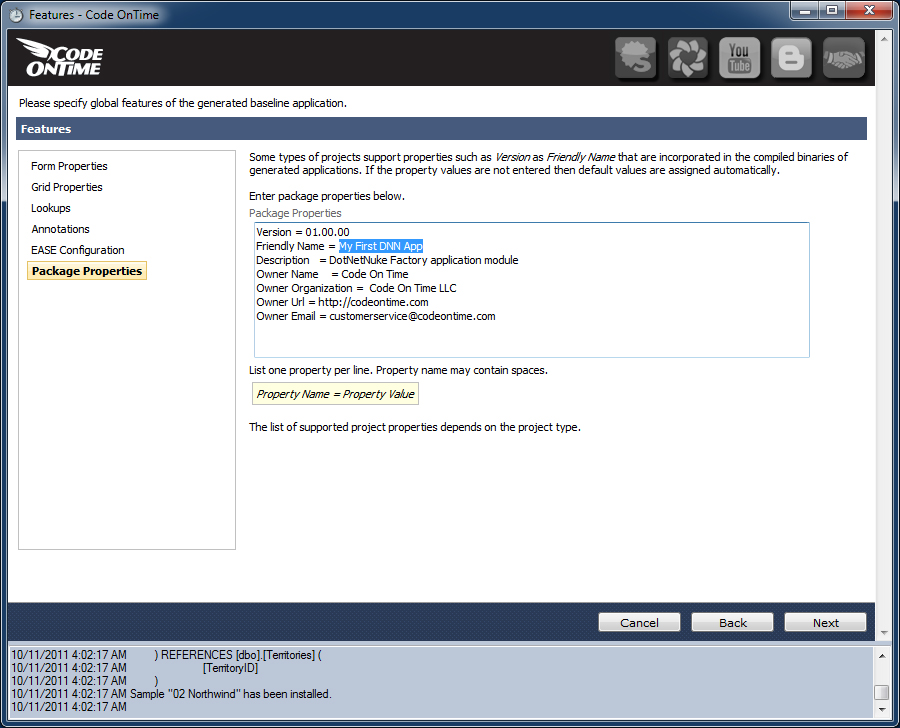
Click
Next button to proceed. Preserve the defaults on the
Business Logic
Layer page. Click
Next and enable dynamic and static reports. Click
Next and select
Package Properties. Enter "My First DNN App" as the
Friendly Name of our application. This will be used by
DotNetNuke
to identify our application.
Click
Next a few more times until you reach the summary of application data
controllers. Click
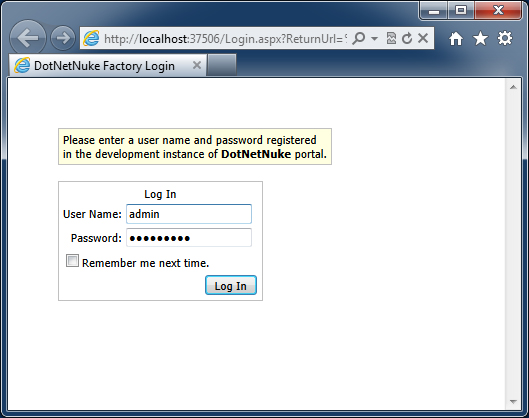
Generate to have the code generator produce the application
source code. Upon generation, a test web application login page will be displayed.
Sign in as
admin/admin123%.
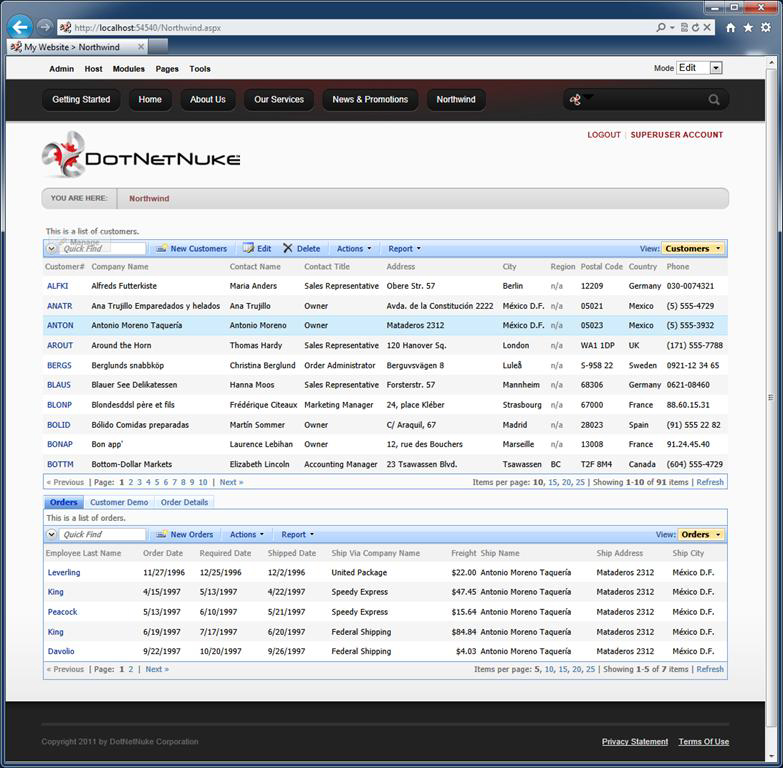
You will have to select a logical page to display. Select
Customers and press
Update to save the selection.
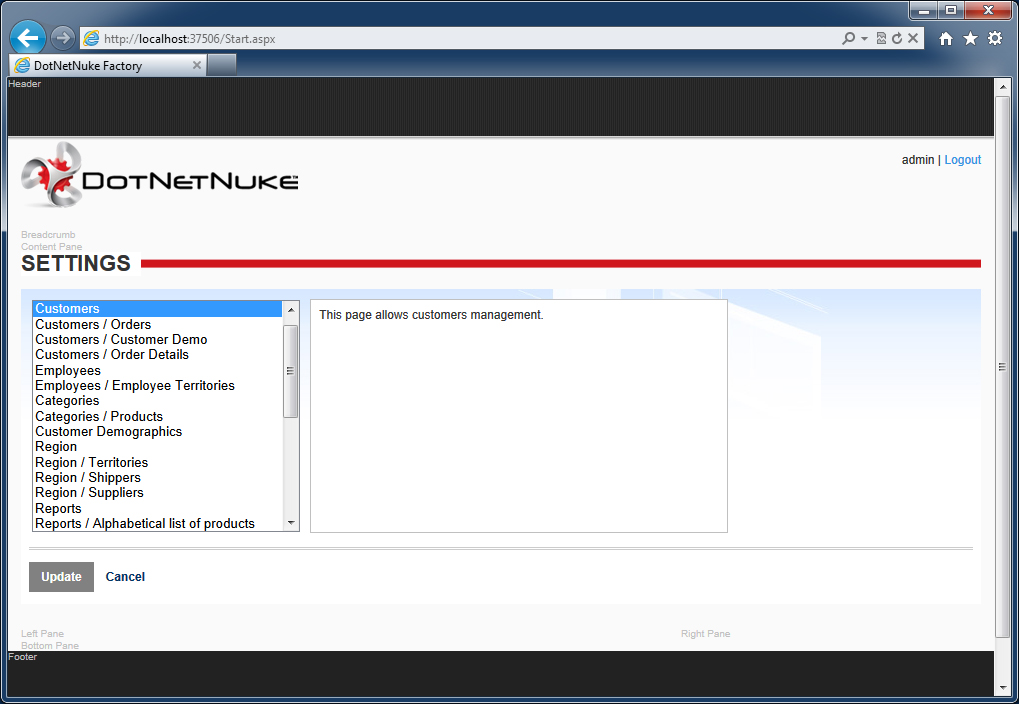
The logical page will be loaded in your browser.

The pages in the screen shots above are not a part of
DotNetNuke portal.
These pages simulate a hosting environment for your application. Your application
“lives” in the
Preview area of the main page of the host application. This
test web app is useful for making changes to the application and quickly previewing.
You can log out and try different identities and configure the host page to present
different logical pages of your applications.
Now it’s time to publish our application to
DotNetNuke portal. Bring up
Code
On Time generator and select the publish action next to your project.

The resource file used to distribute
DotNetNuke modules is created for your
application and presented in
Windows Explorer folder window. You can use
this file to install your application in a different portal. The code generator
will also copy this resource into the installation folder of the previously specified
DotNetNuke instance. We can now continue installation from within our own
DotNetNuke portal.
Bring up the browser window with
DotNetNuke portal. If you have lost the
window then start the application again using
WebMatrix. Login as
host/host123%,
as only host users are allowed to install new modules and other types of extensions.
Click on the
Host link at the top of the portal page.
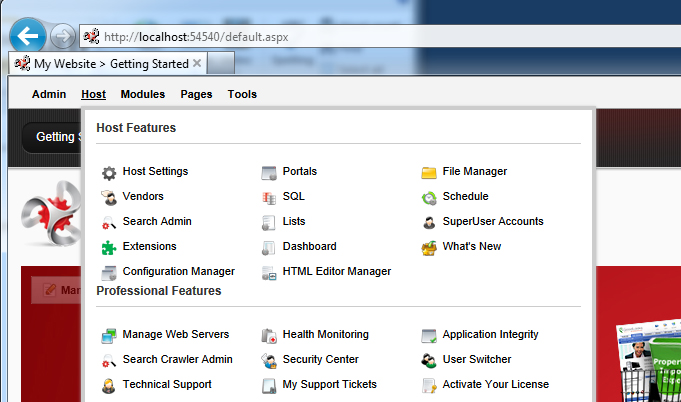
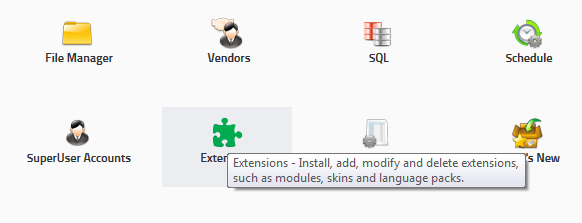
Click
Extensions option under
Basic Features.
Click on the
Available Extensions tab and expand the
Modules section.
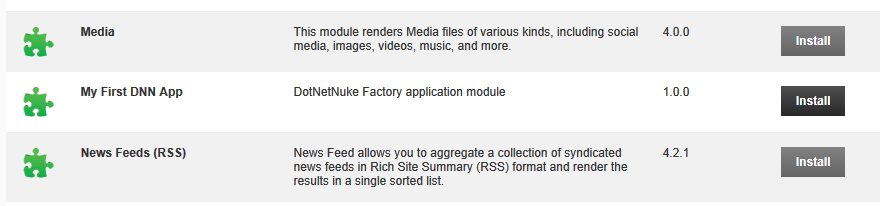
Find
My First DNN App and start installation. Make sure to check the box
titled “Ignore File Restrictions”.
DotNetNuke maintains a list of “approved”
applications. Ours is brand new and is not going to be on the list.
Click the
Next button a few times. Note that both release notes and license
can be changed if you open the application in
Visual Studio. Accept the license
and allow installation to finish. Press the
Return button once, and wait
for the page to refresh by itself while the application pool of the portal is restarted.
Our module is now installed and can be found (and uninstalled) on
Installed Extensions
tab.
Navigate to the home page of your application. Add a new page titled
Northwind
by moving your mouse over the word
Pages and enter page information under
Add New Page section. Make sure the page is inserted after
News & Promotions.
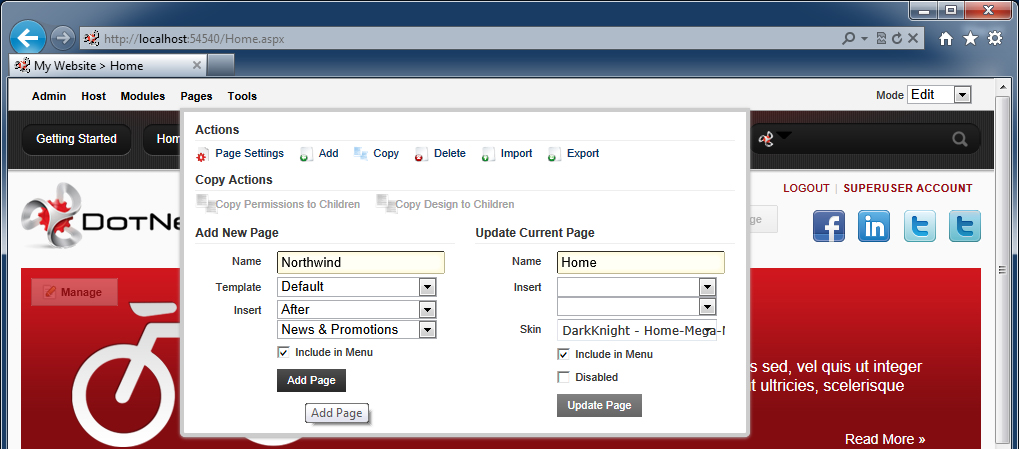
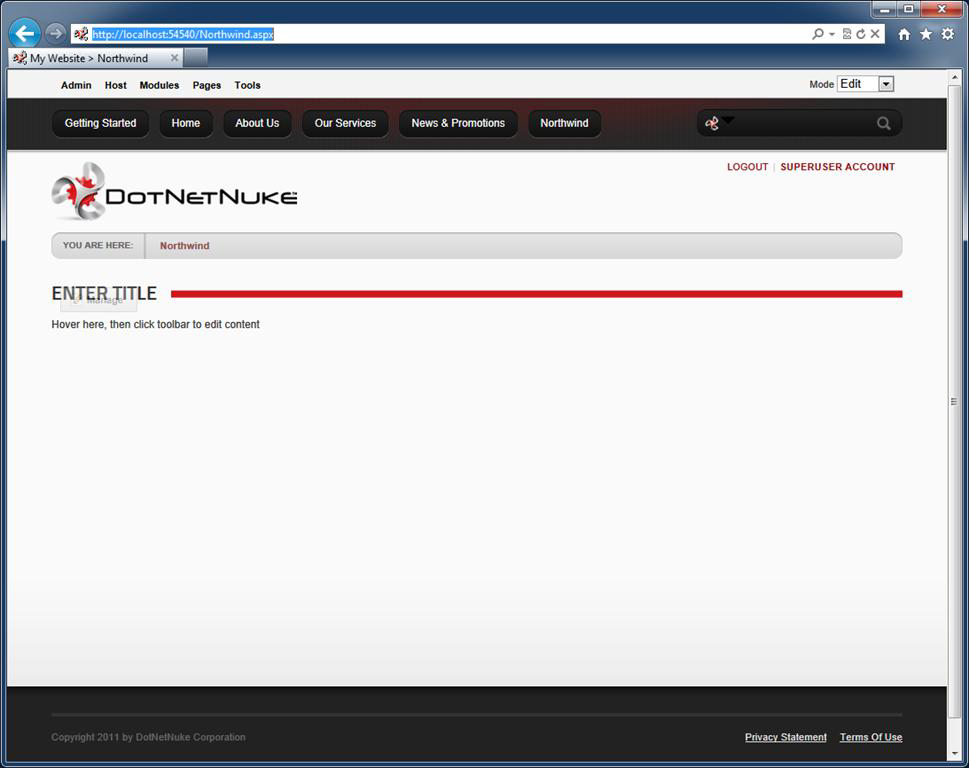
The new page will be created and displayed as a
Northwind option on the menu.
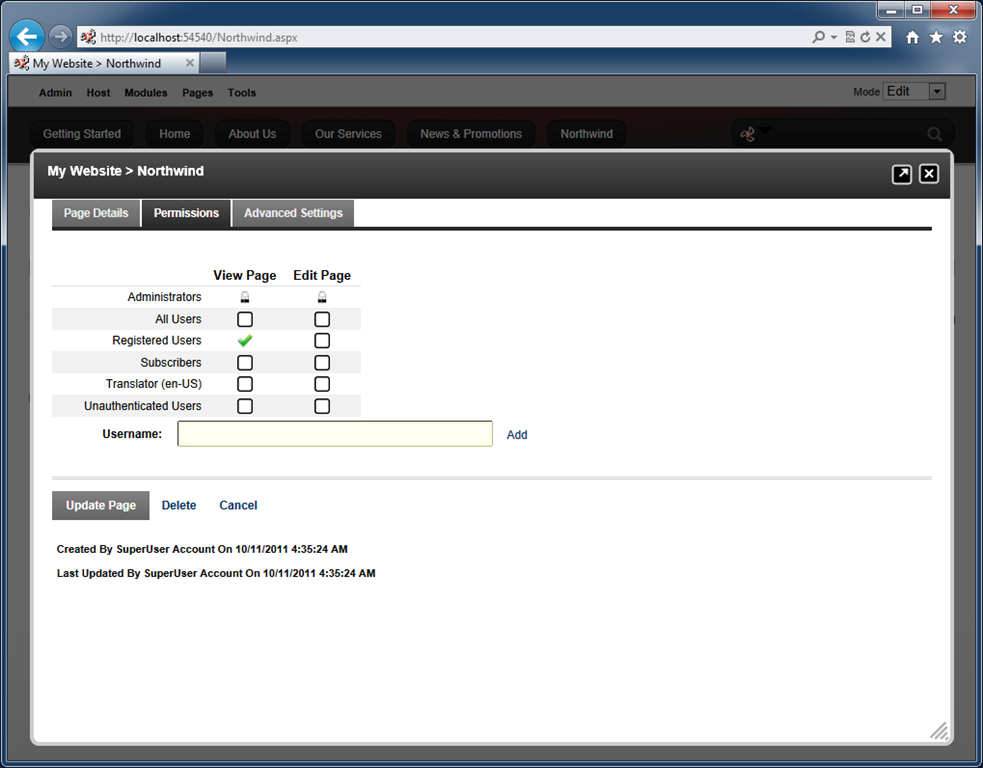
Settings can be activated if you mouse over
Pages at the top and click
Page
Settings. Change page
Permissions to ensure that only registered
users can see the content.
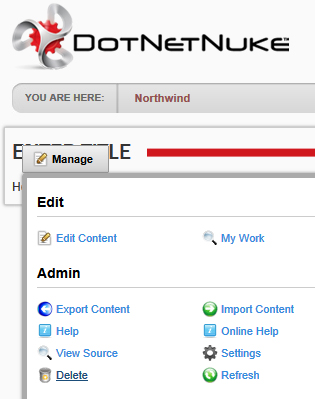
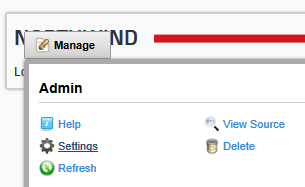
Mouse over the transparent
Manage button displayed in the top left corner
of the "ENTER TITLE" content module. The button will become opaque and will show
you the menu of available options. Delete the content module from the
Northwind
page.
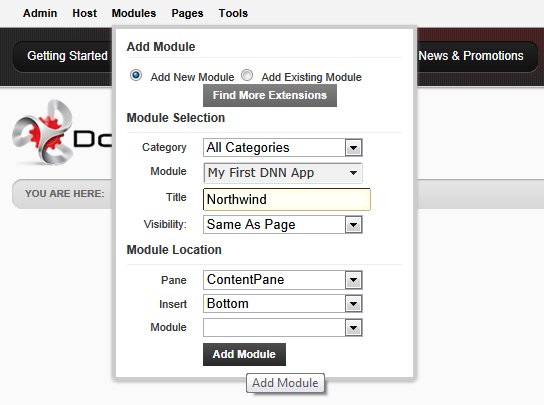
Mouse over
Modules link at the top of the page, select
All Categories
under
Category, and choose "My First DNN App" option. Enter
Northwind
in the module
Title, and press the
Add Module button.
The module is instantiated and now requires logical page selection.
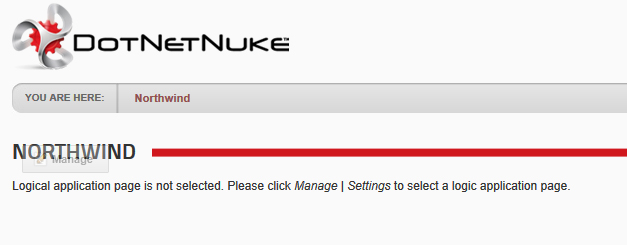
Mouse over the transparent
Manage button and select
Settings.
Select "My First DNN App Settings" tab and select
Customers page.
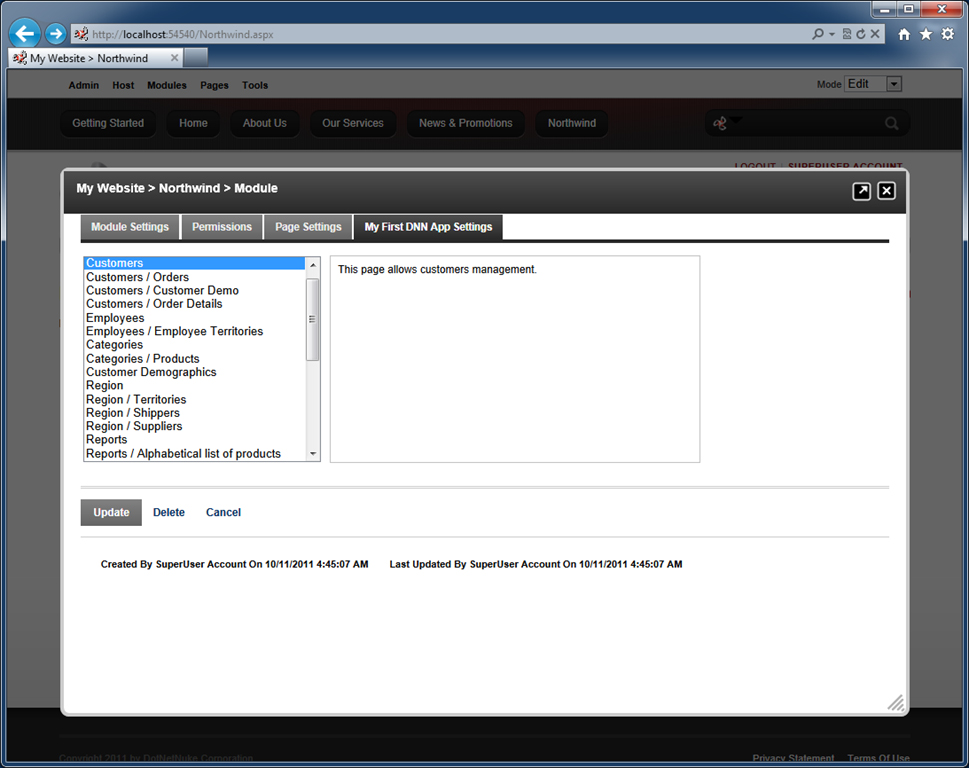
Select
Page Settings tab and, under
Basic Settings, set
Module Container
to "Host: DarkNight – Invisible". Update module settings by clicking on
Update
button at the bottom of the screen. An application page similar to the one in the
picture will show up.
If you modify your web application in
Code On Time Designer, you can use
the test web application of the project to test the changes. Publish the project
when you are satisfied with your modifications. A resource file will always be created
upon publication. If the module has been installed, then the installed version will
be automatically updated to the latest version. Simply bring up the browser window
with the portal page and refresh the page to see the changes.
Implementation of line-of-business web applications integrated with
DotNetNuke
portal is made easy with
Code On Time Generator and
DotNetNuke Factory.